1. Introduction
In this article, we will see some basic configuration of Tomcat like how to configure tomcat for multiple instances and how to deploy war files with JNDI name.
2. Tomcat Configuration
We will cover below topics in this post:
- Changing Ports of Tomcat
- Adding users for Tomcat
- Configuring JNDI name
- Passing startup parameters to the server
- Externally loading WAR files
Lets start digging in each of these.
2.1. Changing Ports
By default Tomcat server uses port 8080 but due to some reason port 8080 is in use or due to some organizational policy you need to use any other port; say you have to use port 9090. We can achieve the same bu changing only 1 port in the configuration file but we will change ___ ports so that we can run multiple instances of the tomcat on the same machine. To change the same goto conf folder in home directory of tomcat and edit server.xml file. i.e. /{TOMCAT_HOME}/conf/server.xml as below:
<Server port="9005" shutdown="SHUTDOWN">
...

    <Connector port="9090" protocol="HTTP/1.1"
               connectionTimeout="20000"
               redirectPort="8443" />
...

<Connector port="9009" protocol="AJP/1.3" redirectPort="8443" />
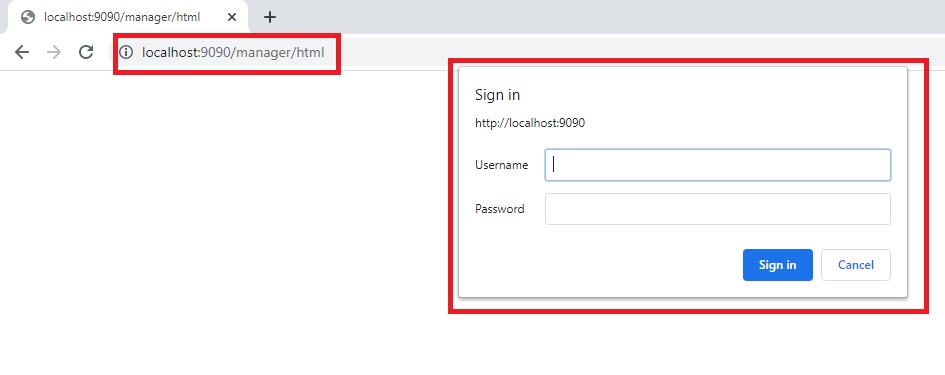
After these changes start the tomcat and see the try to access the tomcat on http://localhost:9090/
 Start Tomcat - {TOMCAT_HOME}\bin\startup.cmd
 Stop Tomcat - {TOMCAT_HOME}\bin\shutdown.cmd

2.2. Adding users
To access manages applications of or Host manager you will need username and password and to configure the same edit tomcat-users.xml file in /{TOMCAT_HOME}/conf folder as below:
<user username="codeyatra" password="codeyatra" roles="admin-gui, manager-gui"/>
2.3. Configuring JNDI name
There are times when we need to use JNDI names to access the database, to configure the same we need to edit two files in /{TOMCAT_HOME}/conf folder.
<!-- server.xml -->
<GlobalNamingResources>
...

	<Resource name="jdbc/CODEYATRA_PG"
		  auth="Container"
		  type="javax.sql.DataSource"
		  driverClassName="oracle.jdbc.OracleDriver"
		  url="jdbc:oracle:thin:@<HOST>:<PORT>:<SID>"
		  username="codeyatra_db"
		  password="codeyatra"
		  maxTotal="20"
		  maxIdle="10"
		  maxWaitMillis="-1"/>
...
</GlobalNamingResources>
<!-- context.xml -->
<Context>
...
<ResourceLink name="jdbc/CODEYATRA_PG"
global="jdbc/CODEYATRA_PG"
type="javax.sql.DataSource" />
...
</Context>2.4. Passing Startup parameters for app
If we need to pass any startup parameters to the deployed application on tomcat we need to add catalina.bat file in /{TOMCAT_HOME}/bin folder like below. Here, we are passing parameter – bankName with value as “XBank”
set "CATALINA_OPTS=%CATALINA_OPTS% -DbankName=XBank"2.5. Externally Loading WAR file
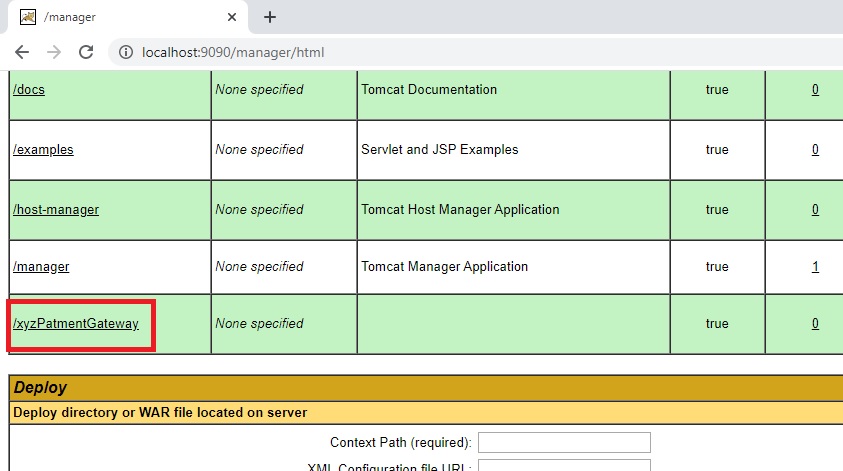
There are changes when we need to use different context name of an application than the WAR name, like to avoid version details of the application. For example say name of your WAR file is xyz-payment-gateway.1.0.2.3.war and you want to use context path as /xyzPatmentGateway. To do so we need to edit server.xml file in /{TOMCAT_HOME}/conf folder and add Context path there like below. Once server is up same cam be accessed at http://localhost:9090/xyzPatmentGateway/ and can be seen under Managed Apps in Tomcat
<Host name="localhost"  appBase="webapps"
            unpackWARs="true" autoDeploy="true">

     <Context path="/xyzPatmentGateway"
	docBase="E:\DeployedWars\xyz-payment-gateway-1.0.2.3.war" />
3. Conclusion
To summarize, In this article we have shown tomcat configurations for multiple instances and deployment of war file with JNDI name. In this article, we are using Tomcat 8 but configuration will be similar for other versions as well.
I am actually thankful to the owner of this web page who has shared this great post at here. Claude Odey Kwabena
You should be a part of a contest for one of the finest sites on the internet. Lisa Prinz Noletta
I am so grateful for your article post. Really looking forward to read more. Cool. Merrie Clemens Kellsie
Definitely, what a great blog and revealing posts, I definitely will bookmark your site. Best Regards!
I got what you intend,bookmarked, very decent website.
I am incessantly thought about this, thanks for posting.
Great post
Great